LEONARDOjoy
LEONARDOjoy is the latest in my project to allow rhythm game enthusiasts construct their own controllers. This is once again a code for allowing you to play the hit weeb game K-shoot MANIA. This code unlike my previvous attempts requires no hardware flashing, and uses M+KB emulation instead of relying on UNOjoy. However LEONARDOjoy is a very low level attempt at this, and can be used to make all kind of controllers keep an eye out for my IIDX tutorial coming soon(12/22/2015)
I hope you enjoy, and once again if you have any question feel free to contact me at:
bemani@airmail.cc
Looking for the old tutorials?
Go to the ACrealIO Tutorial
Go to the UNOjoy
QUICKLINKS
Code
Parts List
Install
Building A Controller
Graphics
Gallery
Code
Just download this code and upload it to your Arduino thorugh the Arduino IDE and your done! That was easy!
http://pastebin.com/3ypgaRBd
Parts List
This is similar to the SDVXjoy parts list just swap out a Leonardo for the Mega 2560. All parts are listed on eBay with the sizes refrenced so you can buy anywhere.
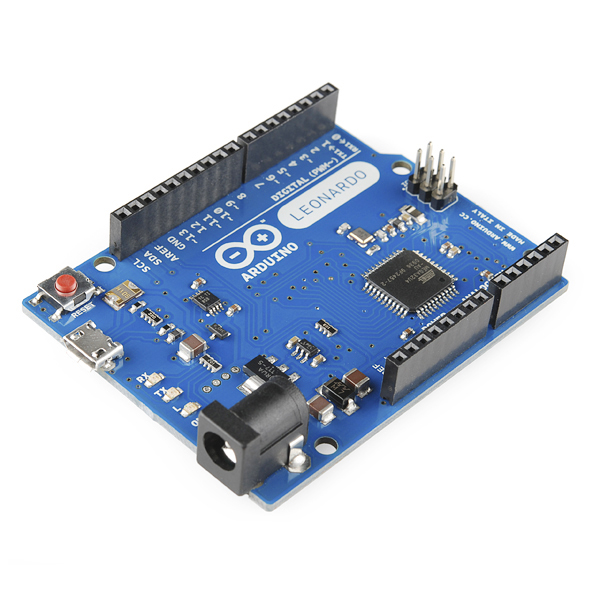
Arduino
Get an Arduino Leonardo R3. Chinese clones work fine yo.
Arduino Leonardo: US SELLER $13
ENCODERS
Get atleast 24ppr with no detents and you'll be fine. 20-25mm Shaft Height.
Lanman Encoders The encoders from the Lanman Kit.
Bournes 24ppr, No detent, 25mm shaft, Switch $1
Bournes 24ppr, No detent, 25mm shaft, Switch, LED blue $2.50
KNOBS
Arcade Size are 30mm Wide.
BUTTONS
So you can use the full 60mm buttons or go ghetto mode here, I went ghetto mode with a pack of 7 Beatmania buttons that I used for every button on the controller.
7x Beatmania Buttons $24 You can ask for custom colors. The springs are a little heavy, and the switches are heavy. But if you switch to a light Omron it should balance out.
FX
These are beatmania sized.
BT A-D
60mmX60mm. Available from Chinese makers or Sanwa.
Aliexpress Chinese Buttons $30 You can get them in sets of 4, just message the seller and ask.
Start
33mmX33mm Square, honestly just get another beatmania button, these are a fucking pain to source.
Switches
Use the switches that came with your Chinese buttons or upgrade to Omrons. Available from Mouser as well.
Omron 50g $2.50
Installation
So with this tutorial I'm going to go a little more indepth. Hopefully this will help those with little to no experince with this type of stuff get a better handle on it.
Wiring
Wiring a controller is incredibly simple once you have a few key concept down.
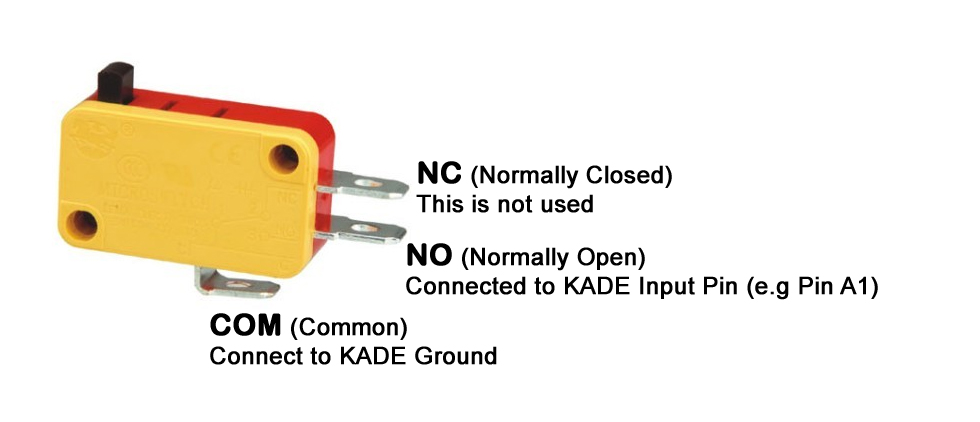
A microswitch usually has three prongs, NO, NC, and Ground. For this
tutorial we will only use the NO and Ground. While the button is presses
it closes the circuit and sends a singal to the arduino registering the
keypress in your game.
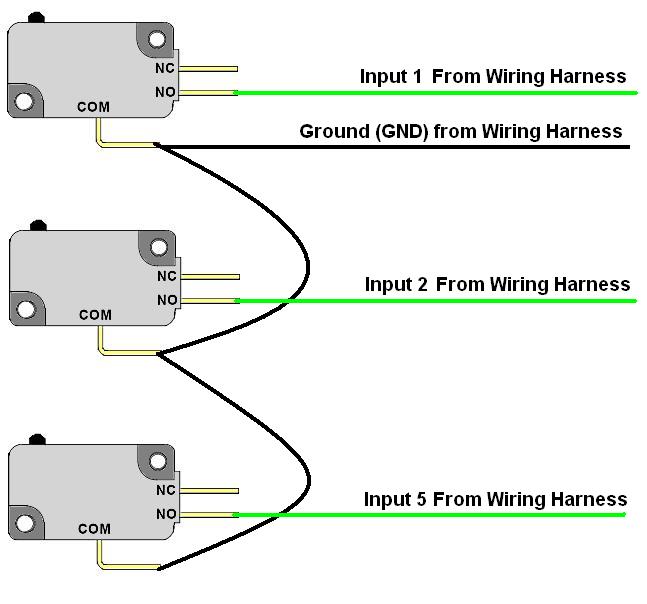
For the the ground, the easiest ways is to make a Daisy-Chain, multiple wires that attach to the grounds of all buttons and encoders, then attach it to the ground terminal on the Arduino.
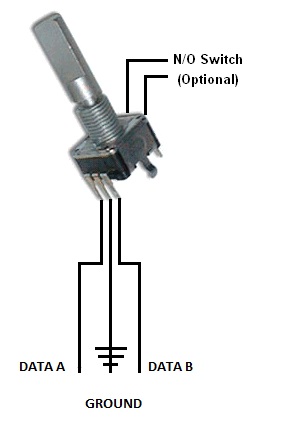
And for the encoders, most come with 3 pins, DATA A, DATA B, and GROUND(Usually inbetween the Data Pins). Each data pin needs to be wired to a certain point on the Arduino, while the ground can be in your daisychain. Some other encoders come with two additional pins to act as a button(Dont get these)
Pinout Diagram
The Pins are assign to button presses on a keyboard, so You can configure them anyway you want in Bemanitools, or KSM. But this is the reccomended setup. Test and Service defined in the code but commented out, so it up to you if you want to have a physical button on your controller, or just use a regular input.
| Button | Pin # | Keboard |
|---|---|---|
| FxR | 4 | a |
| FxL | A0 | b |
| BT-A | A1 | c |
| BT-B | A2 | d |
| BT-C | A3 | e |
| BT-D | A4 | f |
| Start | A5 | g |
| Test | A6 | - |
| Service | A7 | - |
| ENCODERS | DATA 1 | DATA 2 |
|---|---|---|
| Encoder Right | 0 | 1 |
| Encoder Left | 3 | 2 |
Box buidling
Tools needed
- Saw
- Drill
- Hole Saw Attachment 1-inch
All arcade buttons use about a 1-inch hole to thread the buttons in, so If you have this simple tool building a box becomes a lot easier. After following the spacing diagram and creating your panel, insert your buttons and lock them in with the nut. I recomend using a thin wood panel if your going to use a plexi panel on top(Be careful cutting plexi it can crack easy.)
Spacing Diagram

I recommend using this, so heres a simple layout(SVGFile) for using
IIDX buttons on your controller. SVG files are openable with the Inkscape program. Or you can use this PSD All graphics are from Homingpuyo

And the full Arcade button size SVG is here.

Graphics
Here are a few templates for creating custom Controller art, so you can play on your waifu.
ADD LINKS HERE
Troubleshooting
Q: Help! My controller isnt working!
A: Don't be a dingus.
Q: Why are your tutorials so shit.
A: I'm a dingus.
Gallery
Send in images of your controller!
!
Credits
Thanks to the Bemani community first and foremost!
Thanks to the INSERTNAME HERE from /PSUN/ for posting the Code
Homingpuyo's Write up and Graphics